# Reimagining a Two-Century-Old Discovery in Your Kitchen
Written on
Chapter 1: Introduction to the Voltaic Pile
Creating a DIY voltaic pile is not only straightforward but also an engaging way to connect with scientific history. This experiment, which led to the identification of six elements and two fundamental laws of physics, can be easily replicated at home. I embarked on this project with my four-year-old daughter, and despite my background in chemistry, you don’t need extensive knowledge to succeed. Familiarity with terms like cathode and anode can be beneficial but is not essential. The materials required are easily sourced online. The voltages and currents involved are minimal, so any accidental shocks are unlikely to be painful—consider it a rite of passage for budding scientists!
It's important to note that I am neither an electrical engineer nor a physicist. So, please bear with me if I use terminology incorrectly. If I can manage to pull this off, you can, too!
Section 1.1: Materials Required
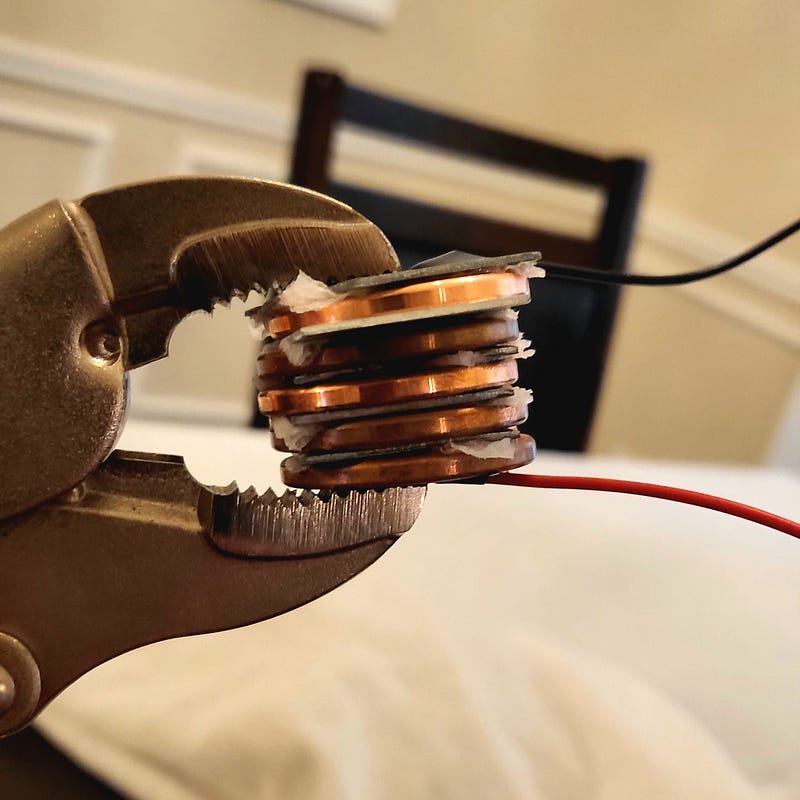
The construction of this device is remarkably simple. Begin by stacking alternating layers of zinc and copper with a saltwater-soaked paper towel between every other layer. Attach wires to the ends, and voilà!
Before you dive in, gather the necessary materials. While some items may be found around your house, others might need to be procured. The original voltaic pile used discs of copper and zinc, which I found readily available from a major online retailer—though I won't name it to avoid giving them free publicity. Zinc strips can be more challenging to find; I managed to locate strips approximately 1" by 4", which required pruning shears to cut into smaller squares. If you're feeling adventurous, you can also use aluminum or magnesium in place of zinc—aluminum is safer, while magnesium offers greater power.

Section 1.2: Setting Up Your Voltaic Pile
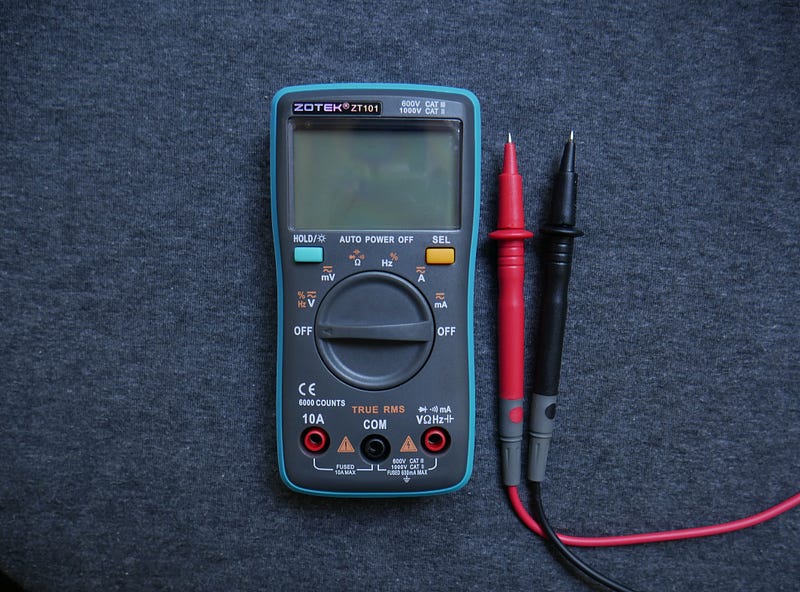
You will also need some additional supplies to enhance your experiment. A wire to connect to the pile's ends, electrical tape, and a clamp to hold everything together will be beneficial. A multimeter is essential to measure the voltage and current generated by your pile. Lastly, gather some fun components like colorful LEDs or a kit with motors.
Once you have everything, start by attaching a wire to a copper piece and a zinc piece. If you have zinc strips, cut them into approximately 1" by 1" squares using durable scissors. Ensure the metal parts of the wires firmly contact the copper or zinc, and clean the metals if they're not shiny—use a brillo pad or sandpaper for this.
At this stage, simply placing the two metal pieces together and connecting the wires to a multimeter (set to voltage mode) will yield no results. This is due to the absence of a "salt bridge," which is vital for completing the circuit. A salt bridge allows for the movement of electrical charge, balancing the flow from zinc to copper.
Creating a salt bridge is easy: mix a tablespoon of salt into a cup of water, then soak a paper towel without making it dripping wet. Fold it to match the size of your copper disc and place it between the zinc and copper. You may want to clamp the discs together at this point.
Chapter 2: Measuring and Experimenting
In the video titled "Tim Smith Recreates 200 Year-Old Whiskey Recipe Using A Log Still," we explore the fascinating process of reviving historical recipes, much like how we are revisiting the voltaic pile.
After setting up the salt bridge, you've successfully created one cell of your voltaic pile, and the wires are now live. Be cautious and avoid touching the ends directly to prevent a short circuit. Connect the wires to the multimeter probes and note the voltage reading. Ideally, a zinc-copper cell should produce around 1.10 volts. If you achieve this, great! Keep this number in mind for later experiments.
Next, try lighting an LED or powering a motor by connecting the wires to their respective terminals. If it doesn't work, reverse the wires—LEDs and motors only allow current to flow in one direction. If your voltage is too low, you may need more cells to achieve sufficient power.
To increase voltage, remember that cells in series add their voltages. For each additional zinc-salt bridge-copper combination, you can gain more voltage. Just ensure that each cell has its own salt bridge.

With a little ingenuity, you can recreate a two-century-old discovery right on your kitchen table. I managed to generate about 4 volts from five cells, enough to illuminate various LEDs. The current produced was about 1 milliamp, which might not be sufficient for some motors, but is generally safe.
Be prepared for some oxidation on your plates after use, which you can clean off with sandpaper or a scotch-brite pad before repeating the experiment. If you're feeling ambitious, consider electrolyzing water for a more advanced project—akin to moving from Volta to Faraday in scientific history.
Ultimately, recreating this historic device in your home is straightforward and enriching, allowing you to connect with the scientific pioneers of the past.
In the video "KITCHEN BEFORE & AFTER VICTORIAN HOME REMODEL vintage kitchen renovation DIY," we can draw parallels between the intricate process of renovation and the detailed assembly of our voltaic pile. Both projects require patience, creativity, and an appreciation for history.